

Children’s fun geological activities
A page of Children’s fun geological activities to play with.
Make a volcano….
Mix 20 ml of bicarbonate of soda, 30 ml of water, a few drops of washing up liquid, a few drops of red food colouring and 5 ml of dry wallpaper paste granules together in a 200ml plastic bottle and leave to stand for 5-10 minutes.
Stand the bottle somewhere you’re parents won’t mind a mess….
Build up soil or sand around the bottle to look like a volcano – making crater walls around the bottle neck but don’t let any fall into the bottle.
Add the vinegar and stand back ………….
Science the vinegar [an acid] reacts with the bicarbonate of soda releasing carbon dioxide gas which bubbles up frantically to escape ‘blowing’ the mixture out of the bottle. In a real volcano, gas pressure helps to eject molten rock [‘magma’] out of the crater, sometimes very violently.
Children’s fun geological activities : Make your own geode….
[safety note : you may need help for this].
Boil 100 ml of water and add salt gradually, stirring all the time until no more will dissolve. you can add a few drops of food colouring if you wish.
Place some half eggshells into an egg box and fill with the solution you have made.
Place the box somewhere warm [eg an airing cupboard] and leave undisturbed for a few days. Look regularly to see the crystals growing.
You can use any type of salt, for example epsom, alum or table salt [you should be able to get the first two from a good chemist].
Science : salts dissolve in hot water and as it cools down they crystallise out. If the solution cools down slowly the crystals normally grow bigger. In a real geode, a fluid is trapped in a cavity in the rock and slowly either cools down or the liquid evaporates letting crystals of quartz or calcite grow in the cavity. Impurities cause all sorts of colours.
Advice from National Museum of Wales for growing crystals
Explore mineral deposits
This from the U S geological service on experimenting with plate tectonics and mineral formations – using oranges and cup cakes !
Make your own fossils….
Take some plasticene, modelling clay, Playdoh and squish it around in your hands till its nice and soft.
Take any shell, bone or similar item , maybe a beak or skull and press the clay around it, making sure the are now gaps or air holes. Gently peel the clay away from the object making sure you don’t disturb the mould you have just made [the shape of the object in the clay]. Perhaps it is easiest to start with a simple object like a shell.
Make a small ring of clay to surround the mould. Brush the imprint with a little washing up liquid to make it easier to remove your cast.
Mix some Plaster of Paris or a proprietary filler like Polyfilla [which you can buy from any DIY shop] and fill the mould. Allow to dry as recommended on the packet [ longer for bigger shapes]
Gently pull the clay mould away from the cast you have made, being very careful with complex shapes not to break off small bits.
Science : in nature, parts of creatures are buried in sediment which gradually hardens into rock over long periods of time. Their hard parts, bones, shells etc are slowly replaced by salts in groundwater passing through the rock. When you split the rock, you will see a mould [imprint] on one half and a cast [replacement shape of the fossil] on the other. You have made your own mould out of clay and cast out of plaster.
Advice from National Museum of Wales for for making fossils from dough
Children’s fun geological activities : Make dinosaur puppets and fossil models
The BGS website, amongst various information pages, has instructions for making dinosaur puppets and models, and timelines to colour in.
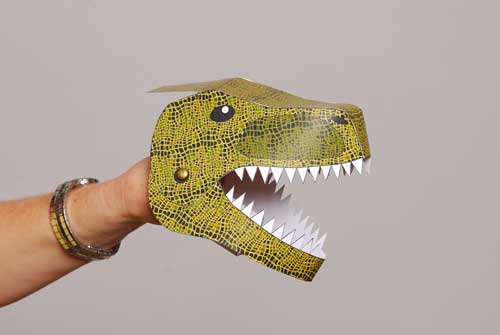
- Download the cut-out puppet of Tyrannosaurus rex in colour or black and white to colour yourself.
- Cut around the four parts of the model — you may need to get an adult to help you.
- Head: fold the flaps inwards and fold the ends of the upper jaw towards each other and glue to the top of the head.
- Lower jaw: fold along the score lines near the middle of the head.
- Finger loops: bend into a cylinder and glue.
- Pierce the black dots with a pencil, then attach the lower jaw to the head with split pins.
- Glue a finger loop to the top jaw and another to the bottom jaw.
Mimic acid rain….
Collect various rock types and drizzle some vinegar over them. Some will fizz violently, some gently and some, seemingly not at all.
Science : vinegar is an acid, much stronger than rainfall, which will react with calcium carbonate in rocks. Chalk will fizz pretty strongly, limestone much more gently but in both cases the acid is liberating carbon dioxide gas from the calcium carbonate in the rock. Some sandstones have calcium carbonate cementing the sand grains together; if you drip vinegar on them, the cement will fizz slowly and dissolve.
In nature, water contains some dissolved carbon dioxide making it a weak acid which dissolved calcium carbonate; polluted rainwater – ‘acid rain’ – contains dissolved sulphur dioxide and some nitrogen oxide gasses which make a much stronger acid. This rainwater or acid rain attacks rocks dissolving calcium carbonate -” weathering” them away, whether natural rock outcrops or buildings.
Make your own sedimentary rocks ….
You will need a container – maybe an old margarine [butter] tub or better a 4 litre ice cream container and lots of different materials – dry sand, gravel, soil, stones and maybe a few ‘fossils’ – and some plaster [ for small experiments Polyfilla is ideal, for larger ones get some real plaster from a large DIY store]
Mix each of your dry materials with equal amounts of dry plaster.
Add layers of each mixture in turn, making sure the top surface is smooth and level. You can add ‘fossils’ as you go – make sure they are at the very edge of the container.
Finally, slowly dribble in water without disturbing the layers. Leave for a couple of days to set hard. Then remove the block from the plastic container. You should see the layered structure with your ‘fossils’ just showing.
Science : in nature, small particles of sand or gravel [‘sediment’ are washed into an environment by rivers or blown in by the wind. they settle in layers, one on top of each other. Sometimes part of dead animals or plants are washed in as well. Over long periods of time the layers are compressed by the weight of the ones above, and water passing through may introduce a cement [usually either calcium carbonate, silica or iron] turning each layer into rock. Any animal remains become fossils, occasionally the actual animal part but more often the mould replaced by something like quartz or calcium carbonate.

Children’s fun geological activities : Make your own mountains ….
The rocks you have just made are hard, like real rocks, but for this experiment we need to be able to similar very great forces in the earth and long periods of time so we will use a different set of materials.
Take a packet of plasticene or several pots of different coloured modelling clay. This will work best if the are warm and easily mouldable.
Form your clay into thin layers about 5mm thick and 25mm wide and 150mm long. Lay them one on top of each other. Place them into a narrow container no wider than the layers of clay.
Gradually squeeze the two ends towards each other; you should see the layers begin to bend into ‘folds’, some upfolds and some downfolds. These folds will get tighter the more you squeeze.
Science : layers of sedimentary rock, when compressed by lateral forces driven by plate tectonics [ie squeezed from either end] will begin to fold just like your clay layers. When the fold is upwards like an arch, it is called an anticline; when the fold is downward like a U shape it is called a syncline. Some folds are gentle, others are very tight.


there are lots of details about folds
Learn about dunes
Children’s fun geological activities : Dune Battle. Slightly similar to a popular category based card game, players battle it out with some of the fifty or so plants that you can find in the sand dunes. These cards are so aesthetically pleasing and factful that they bring delight every time our students play. The cards were also used by the Geography department as a stimulus ahead of their coursework planning last year.
By playing Dune Battle for 10 minutes on a regular basis, students were subconsciously learning about the flora they find in the dunes, where they can find them, how big they are and some interesting facts about adaptations for survival that they possess. As a teacher, what made me truly grateful of Dune Battle was just how independent and diligent they were when collecting their data in the Autumn. Not only did they invest the time surveying their quadrats properly, but they were genuinely excited about seeing the plants that they had been playing with over the previous month. learn more and download the game from the link below:
Understanding rivers
From the water cycle to how to filter water, this page holds resources, information notes and activity plans which allow learners of all ages to gain knowledge about all aspects of this important natural resource.
Projects and Resources online
Geological Society: Take your pick from this selection of lesson plans, designed to teach students about volcanoes, rocks and minerals, plate tectonics, forensic geology, relative dating, and the geological features of the British Isles. There’s also a great educational module on the rock cycle.
Science Buddies has lots of projects in geology
Earth Science World Image Bank: This incredible database contains images related to numerous aspects of geology. You can search by category—such as caves, glaciers, igneous rocks (formed by volcanoes), palaeontology (the study of fossils), or soil—as well as by continent, country, and keyword. Images are often an important teaching tool, and this resource provides access to a seemingly endless array of educational, captioned images.
geology.com: An excellent starting point for learning about all things geology. This site has sections on diamonds, energy, landslides, plate tectonics, and more. You can also learn all about different kinds of rocks, from obsidian to granite.
Science Kids, Geology for Kids: This kid-friendly page is full of geology games, videos, quizzes, lessons, fun facts, and projects.
Adaptive Earth Science Activities: Published in 1998 by the West Virginia Geological and Economic Survey, this activity book stands the test of time thanks to its hands-on activities and accompanying questions for students and guidance for teachers. You and your family can learn more about why mud-cracks form, how to model geologic columns, and how water erosion affects different kinds of rocks.
Free booklet on rocks theme- “If you love rocks, you will love this unit…and if your kid loves rocks, you will probably love these resources even more!! It includes everything you need to teach a fantastic rock unit (or rock theme)!! I put the unit together for 5 – 8 year olds” says the author..
